Windows Systems
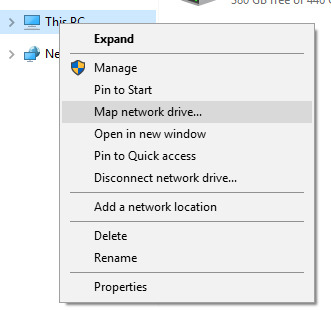
On your PC, right click on “This PC” or “My Computer”
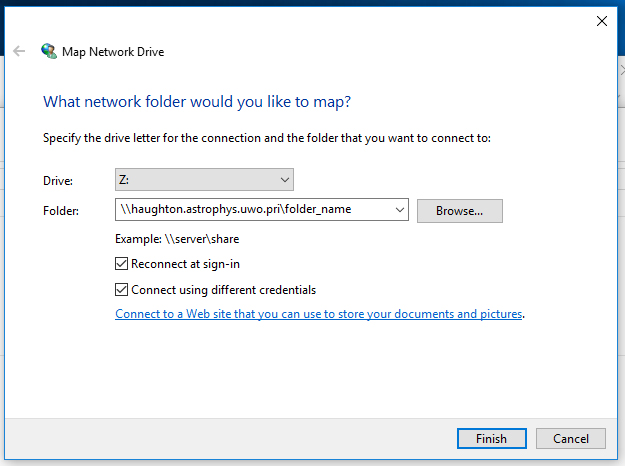
Type in the the following into the Folder dialog box…
\\haughton.sci.uwo.ca\folder_name
Replace “folder_name” with the folder you want to map. This could be your root folder that all your stuff is stored and backed up or it could be one of the shared folders.
Make sure the “Connect using different credentials” is checked off.
The Drive letter can be anything you want. I would recommend you check the boxes to
“Reconnect at sign-in”
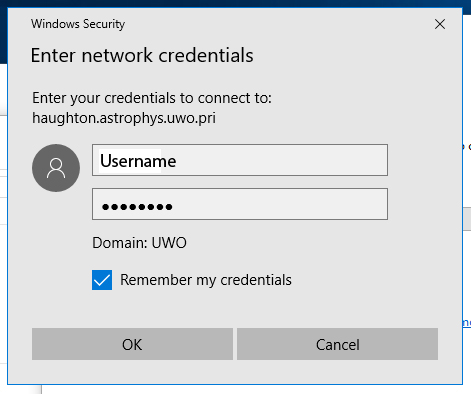
Enter your credentials for the Haughton server and NOT the username and password for the computer.
Ensure “Remember my credentials” is checked on.
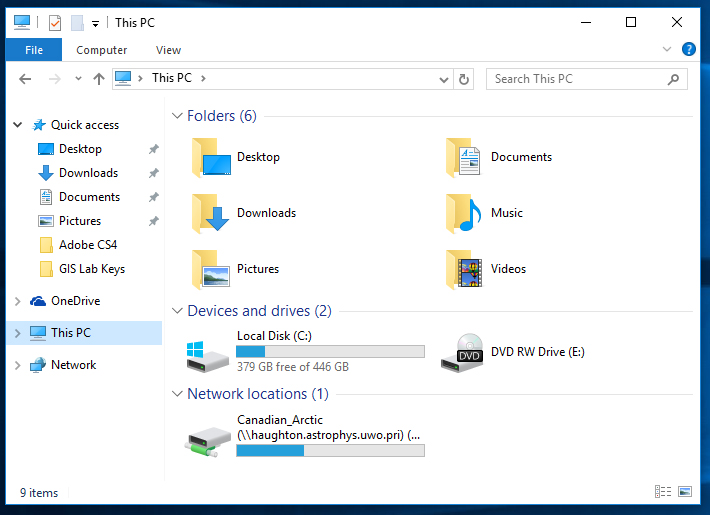
You should then see the folder load containing the content of the drive you just mounted.
You will be able to access the drive through the “Computer” area. The same place you would find USB drives or the local hard drive.
MacOS Systems
From the Finder, hit Command+K
Enter the path to the network drive you want to map, smb://haughton.sci.uwo.ca/folder_name and click ‘Connect’
Enter your login credentials and click “OK”
The drive is now mounted, but continue on to map for system reboot persistence
Now enter into System Preferences, from the Apple menu
Click on ‘Accounts’
Click on “Login Items”
Click on the + button to add another login item
Locate the network drive you previously mounted and click “Add”
Exit out of System Preferences


